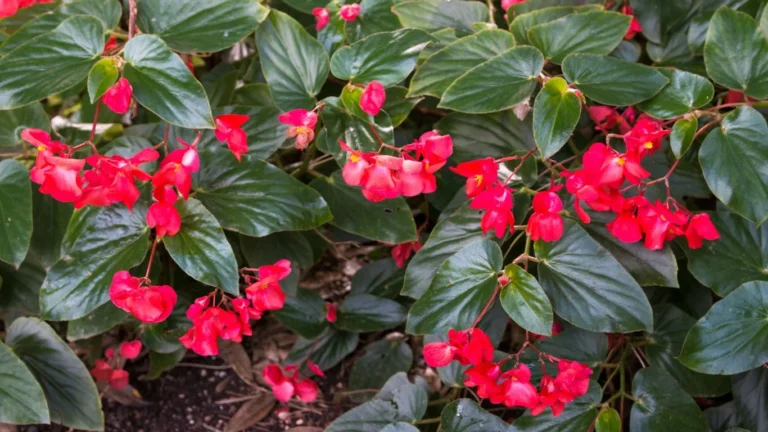
Clematis is one of the most beloved climbing perennials in the gardening world, and for good reason. From deep purples and soft pinks to creamy whites and sky blues, these floral showstoppers can turn any dull wall, archway, or fence into a blooming masterpiece. Often called the “Queen of Climbers,” clematis isn’t just beautiful; it’s surprisingly easy to grow once you understand a few basics
Whether you’re a seasoned plant lover or just getting your hands dirty for the first time, this guide will walk you through everything you need to know about growing and caring for clematis. From choosing the right variety to pruning like a pro, you’ll soon be on your way to growing these climbing beauties with confidence and joy.
Let’s dive in—and let clematis climb its way into your garden and your heart!
Meet the Clematis
Clematis may just be the star of your garden—its vibrant blooms and versatile growth make it a must-have for any plant enthusiast. Before you dive into planting, let’s get to know this climbing beauty a little better.
Quick Fun Facts About Clematis
Type | Clematis is a climbing vine that can also be grown as a bush or shrub, depending on how it’s pruned. |
Lifespan | This perennial can live for many years, often thriving for 10+ years if well-cared for! |
Nickname | Often called the “Queen of Climbers,” clematis is known for its vigorous growth and stunning flowers, which can reach up to 10 inches across.
|
These plants are famous for their dramatic blooms and ability to transform any vertical space into a sea of colour.
Popular Varieties of Clematis
There are over 300 clematis varieties, but some stand out for their beauty, ease of care, and availability. Let’s take a look at a few fan favourites:
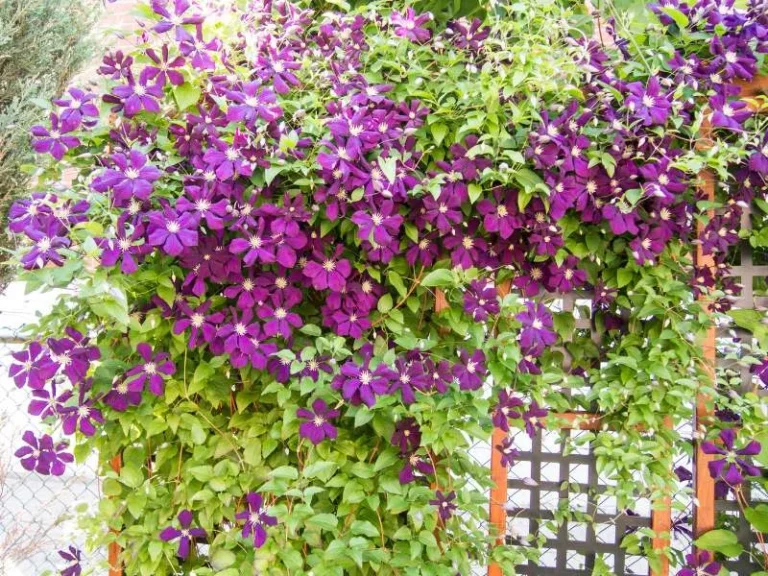
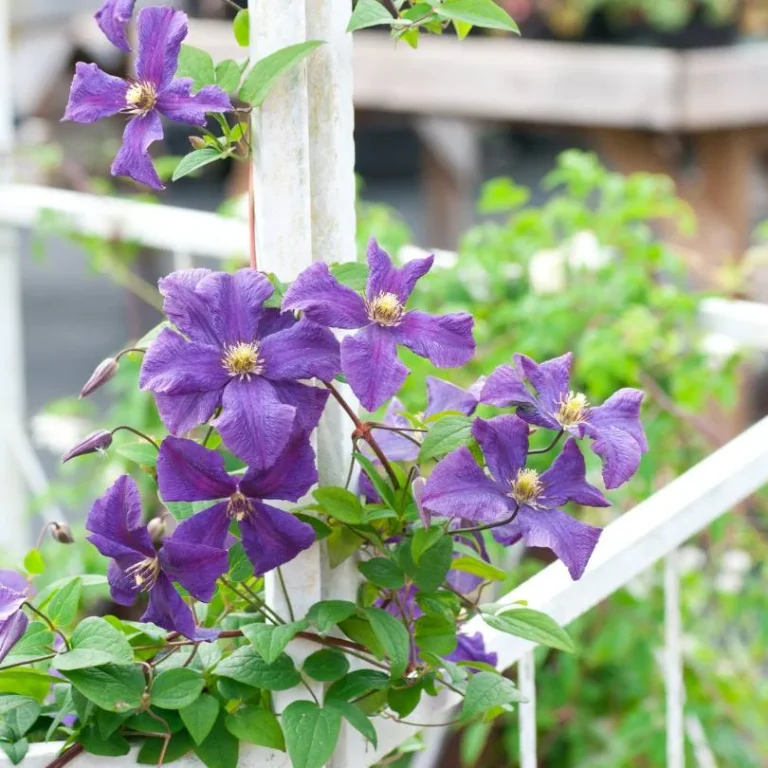
Clematis ‘Jackmanii’
🌸 Bloom Color: Rich, deep purple
🌼Flower Size: 6–8 inches wide
✨Best For: Gardeners looking for a classic, reliable climber. It blooms from summer to fall and loves full sun.
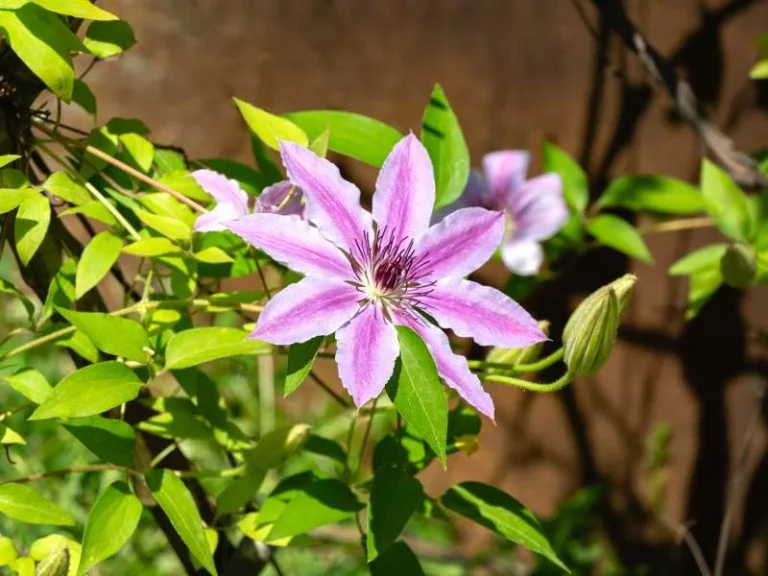
Clematis ‘Nelly Moser’
🌸 Bloom Color: Soft pink with a subtle lavender tint and deep purple stripes.
🌼 Flower Size: 5–6 inches
✨ Best For: Gardeners who want a show-stopper with a unique look. This variety has a long blooming period from late spring to early summer.
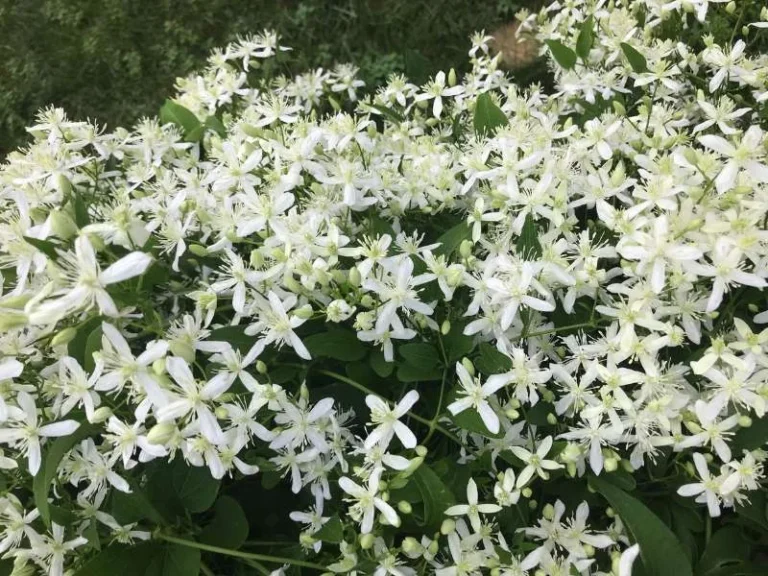
Clematis ‘Sweet Autumn’
🌸Bloom Color: White
🌼Flower Size: Small, star-shaped flowers
✨Best For: Late bloomers. ‘Sweet Autumn’ produces a profusion of blooms in the fall and is perfect for creating a dreamy, fragrant atmosphere.
Which Clematis is Best for Beginners?
If you’re new to gardening, you might want to start with a variety that’s a bit more forgiving. Clematis ‘Jackmanii’ is often recommended for beginners because it’s hardy, grows vigorously, and blooms prolifically. It’s also quite easy to care for and adapts well to different growing conditions.
However, if you’re in a region with a mild climate and are looking for something that flowers late in the season, Clematis ‘Sweet Autumn’ could be an excellent choice too. It’s very hardy and doesn’t require as much attention once established.
Where to Plant Clematis
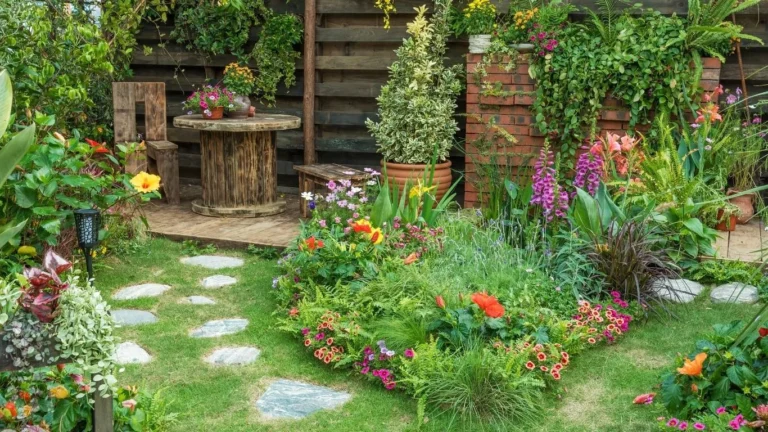
Clematis is a versatile climber that can transform any garden, but to get the best results, choosing the right location is key. Let’s explore where you should plant your clematis to ensure it thrives.
Ideal Location
Clematis thrives when it gets full sun on its leaves and flowers, but its roots need to stay cool and shaded. This unique requirement means you’ll need to position your clematis carefully to meet both needs
Head in the Sun
Plant clematis in a location where it will receive at least 6 hours of sunlight per day, especially during the morning or early afternoon. This encourages blooms.
Roots in the Shade
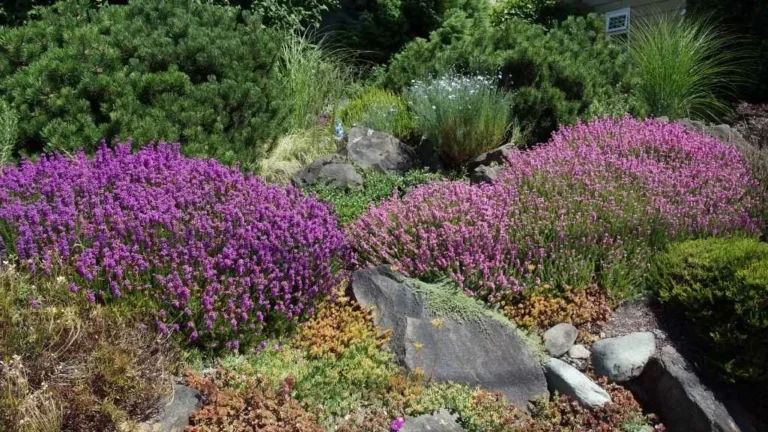
To keep the roots cool and protected from the harsh sun, you can plant clematis near a larger plant or shrub, use mulch, or even place a decorative pot or stone around the base to block out the heat. This will help prevent the roots from drying out, ensuring healthy growth.
Best USDA Zones for Clematis
Clematis is quite adaptable to various climates, but it does best in specific USDA hardiness zones.
Best Zones:
Most clematis varieties thrive in zones 4–9, meaning they can handle colder winters and warm summers with the right care.
Cold Climates:
If you live in colder climates (zones 3–4), choose hardier varieties like Clematis ‘Jackmanii’ or Clematis ‘Polish Spirit’, which are known to tolerate colder temperatures.
Hotter Climates:
In warmer zones (8–9), look for clematis varieties like Clematis ‘Sweet Autumn’, which can handle the heat but still needs its roots protected from the midday sun.
If you are not sure what zone you’re in, use the USDA Plant Hardiness Zone Map to find out which clematis types are best suited for your region
Choosing a Support
Clematis is a climbing plant that needs something sturdy to latch onto, whether it’s a simple trellis or an elaborate arbor. Here’s how to choose the right support for your clematis:
Trellis
A classic option, perfect for small spaces. Clematis will climb the trellis as it grows, creating a beautiful vertical garden. Just make sure it’s tall and strong enough to support its weight.
Wall or Fence
A great option if you want clematis to cover an existing structure. Walls and fences give clematis plenty of space to spread, but be sure the area has good airflow to prevent diseases.
Arbor
If you’re looking for a dramatic effect, a clematis-covered arbor is a showstopper. Clematis vines will climb over the arch, providing both shade and beauty, especially in a garden pathway.
Other Supports
You can also train clematis to climb trees, poles, or even pergolas, just make sure whatever you use is strong enough to support the weight of mature vines.
If you’re thinking about training your clematis on a fence for a tidy, vertical display, check out my content on How to Grow Plants Along a Vinyl Fence: A Detailed Step-by-Step Guide .It’s a great way to maximize space and add vertical beauty to your garden.
How to Plant Clematis (Step-by-Step)
Planting clematis is the first step toward transforming your garden into a colorful haven. Don’t worry, it’s easier than you might think! Follow these simple steps, and you’ll be well on your way to enjoying the beauty of clematis in your garden.
When to Plant Clematis: Spring or Fall?
The best time to plant clematis is either in spring (after the last frost) or fall (before the first frost). Both seasons offer cool weather that helps the plant establish its roots before the heat of summer or the chill of winter arrives.
Spring Planting
Plant clematis in early spring after the danger of frost has passed, giving it plenty of time to settle in and start growing as temperatures rise.
Fall Planting
Fall is a great option too—plant a few weeks before the first expected frost so the roots can establish before winter’s cold sets in.
Soil Requirements
Clematis isn’t picky about soil, but there are a few things it prefers to thrive:
Well-Draining Soil
Clematis hates “wet feet,” meaning it doesn’t do well in soggy, waterlogged soil. Make sure the soil is well-draining to avoid root rot.
Slightly Alkaline pH
Aim for a soil pH between 6.0–7.0 (slightly alkaline). If your soil is too acidic, you can add lime to raise the pH.
Loamy, Rich Soil
Adding compost or organic matter will help nourish your clematis and give it a good start.
Step-by-Step Planting Guide for Clematis
Ready to get planting? Follow these easy steps for clematis success:
1. Dig Deep
Start by digging a hole that’s at least 12–18 inches deep and about 12 inches wide. The hole should be deep enough to accommodate the roots without crowding them.
2. Bury the Crown 2–3 Inches Below the Soil
When planting clematis, bury the crown (the base of the plant) about 2–3 inches below the soil surface. This encourages the plant to grow new shoots from the base, giving it a strong start.
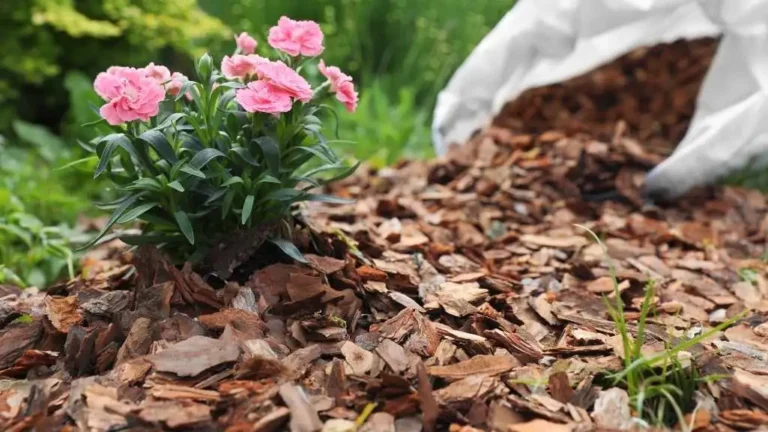
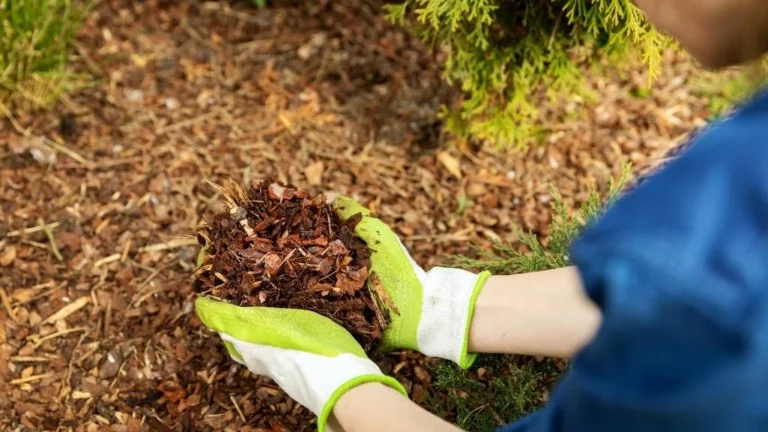
3. Mulch Around the Base
Once your clematis is in the ground, apply a layer of mulch (about 2–3 inches) around the base. Mulch helps keep the roots cool, prevents weeds, and locks in moisture, which is especially important during hot weather.
Watering Right After Planting
After planting, it’s crucial to water your clematis thoroughly to help it settle in. Make sure the soil is evenly moist but not soaking wet. Water deeply around the base of the plant, soaking the roots and allowing them to establish properly.
Keep the soil consistently moist for the first few weeks while the clematis settles into its new home. Once it’s established, you can reduce watering to avoid waterlogged roots.
Clematis Care Tips
Once your clematis is planted and settled in, it’s all about providing the right care to help it thrive. With a few simple practices, your clematis will reward you with abundant blooms year after year. Here are the essential care tips you need to know:
🌞 Light Needs: Full Sun to Part Shade
Clematis is a sun lover, but it also appreciates a bit of shade to keep its roots cool. Here’s how to balance its light needs:
Full Sun (6+ hours per day)
Clematis loves soaking up the sun, especially for its leaves and flowers. It thrives in full sun but can still do well with a few hours of shade.
Part Shade
If your garden doesn’t have a full sun spot, don’t worry! Clematis can tolerate partial shade, especially in hotter climates. Just make sure it gets at least 4–6 hours of sunlight each day.
💧 Watering: Deep and Regular
Watering is key to healthy clematis growth. This plant loves deep, thorough watering to keep its roots hydrated, but it doesn’t like to sit in soggy soil. Here’s how to get it right:
Deep Watering
Clematis needs its roots to stay moist, especially during dry periods. Water the plant at the base to avoid getting the foliage wet (which can lead to diseases). Make sure the water soaks in deeply, reaching the roots.
Regular Watering
During the growing season, check your clematis regularly. Water it every week (or more if it’s particularly hot or dry), but always check the soil moisture before watering again. The soil should be moist but not soaked.
🌱 Fertilizing: When and What to Use
Fertilizing is essential for healthy clematis, but it’s important to get the timing and type of fertilizer just right.
Best Time to Fertilize
Fertilize clematis early in spring, right before it starts putting out new growth. This helps the plant grow strong and vibrant during its blooming season.
What to Use:
Use a low-nitrogen fertilizer to encourage strong roots and flowers rather than excessive leafy growth. A balanced, slow-release fertilizer or organic compost works wonders for clematis. Avoid fertilizers high in nitrogen, as they can encourage too much foliage and few blooms.
🌿 Mulching: Protecting Roots from Heat
Mulch is your clematis’ best friend when it comes to keeping its roots cool and protected.
Protect the Roots
Apply a 2–3 inch layer of mulch around the base of the plant, ensuring it doesn’t touch the stems directly. Mulch helps protect the roots from heat, retains moisture, and prevents weed growth.
Organic Mulch
Use organic mulch like wood chips, straw, or compost. These materials break down over time, enriching the soil and providing a healthy environment for the roots.
🪴 Container Growing: Can You Grow Clematis in Pots?
Growing clematis in a container is a great option if you don’t have much space or want to grow clematis on a patio or balcony. Here’s how to do it:
Choose the Right Pot
Select a large pot (at least 18 inches wide and deep) to give the roots enough space to grow. Clematis has deep roots, so ensure the pot has drainage holes.
Potting Mix
Use a well-draining potting mix with added organic matter to ensure the roots aren’t waterlogged.
Trellis or Support
Just like in the ground, clematis in pots needs a sturdy trellis or support to climb on. Place the container in a sunny spot, but make sure the roots are shaded (you can use a layer of mulch around the base).
Watering and Fertilizing
Containers dry out faster, so keep an eye on moisture levels. Water regularly, and use the same low-nitrogen fertilizer when feeding your container-grown clematis.
Pruning Clematis
Pruning helps your clematis grow stronger, bloom more, and stay healthy. Let’s break down the basics of clematis pruning.
Intro to the 3 Pruning Groups
Clematis is categorized into three main pruning groups, and each group has its own pruning needs. Understanding which group your clematis belongs to is the first step in knowing when and how to prune. Here’s a quick breakdown:
Group 1: Early Bloomers
These clematis bloom early in the spring on old wood (the previous year’s growth). They need minimal pruning.
Group 2: Once and Twice Bloomers
This group blooms once in late spring and again in late summer or fall on both old and new wood. Prune lightly to avoid cutting off flowers.
Group 3: Late Bloomers
These clematis bloom late in the summer or fall on new wood (this year’s growth). They require heavy pruning each spring to encourage strong growth and lots of blooms.
How to Identify Which Group Your Clematis Belongs To
The easiest way to determine which pruning group your clematis belongs to is by looking at when it blooms and how it grows:
Group 1
If your clematis blooms early in the spring (like Clematis ‘Alpina’ or Clematis ‘Macropetala’), it’s likely in Group 1.
Group 2
If your clematis blooms once in late spring or early summer, then again in fall (like Clematis ‘Nelly Moser’ or Clematis ‘Jackmanii’), it’s in Group 2.
Group 3
If your clematis blooms later in the season (July to October) on new wood (like Clematis ‘Viticella’ or Clematis ‘Etoile Violette’), it belongs to Group 3.
If you’re not sure, check the plant’s label or ask at your local garden center for guidance.
Pruning Guide
Pruning doesn’t have to be complicated. Here’s a beginner-friendly guide to pruning clematis, with steps for each group. (Though I can’t provide diagrams here, you can easily find diagrams online or in gardening books that show where to prune.)
Group 1: Light Pruning
- When to prune: Prune immediately after flowering in spring.
- How to prune: Only remove dead or damaged wood. If the plant becomes too large, you can lightly cut it back, but avoid cutting into the old wood where flowers form.
- What to avoid: Don’t cut back too much; these plants bloom on the previous year’s growth.
Group 2: Moderate Pruning
- When to prune: After the first bloom (late spring).
- How to prune: Cut back about 1/3 of the plant after the first flowers fade. You can remove any dead or tangled growth and cut back stems that have finished flowering, leaving the ones that will bloom again later.
- What to avoid: Don’t prune too heavily, as you’ll lose your second bloom.
Group 3: Heavy Pruning
- When to prune: Early spring (before new growth starts).
- How to prune: Cut back the entire plant to about 12–18 inches above the ground. This will remove all the old, dead growth and allow new stems to sprout, encouraging a fresh burst of flowers.
- What to avoid: this group needs a strong prune to encourage growth and flowers
Pruning your clematis might seem tricky at first, but once you understand the pruning groups and follow the simple steps, you’ll be able to keep your clematis in top shape every year.
Common Problems & Fixes
Even the hardiest plants can face a few bumps in the road, and clematis is no exception. But most problems are easily fixable with a little knowledge and care. Here are the most common clematis issues and how to tackle them!
Wilt: How to Spot and Act Quickly
Wilt is one of the most common clematis problems, and it can happen for several reasons, such as pests, diseases, or poor growing conditions.
How to Spot It
- Your clematis may start wilting or drooping, especially in the heat of summer.
- The leaves might yellow, and the plant could look generally unhealthy.
How to Fix It
- Check for Pests: Sometimes, aphids or other pests can weaken the plant, leading to wilting. Check for tiny insects on the leaves and stems and treat with an organic insecticide or by gently washing them off.
- Ensure Proper Watering: Wilting can be caused by water stress—either too much or too little. Make sure the plant has consistent moisture without being waterlogged.
- Improve Drainage: If the soil is poorly draining, the roots may be suffering from root rot, which causes wilting. Add organic matter to improve drainage or repot the clematis into fresh, well-draining soil.
Pests: Aphids, Slugs, and Earwigs
Pests can make clematis their home, but the good news is they’re manageable with the right approach.
Common Pests
- Aphids: These tiny, greenish insects suck the sap from the plant, causing yellowing leaves and stunted growth.
- Slugs and Snails: These soft-bodied pests chew holes in the leaves and can severely damage your clematis.
- Earwigs: These nocturnal pests can also munch on the foliage, leaving ragged holes.
How to Fix It
- Aphids: Spray the plant with a soapy water solution (1 tablespoon of dish soap to 1 gallon of water) or use an organic insecticide to get rid of them.
- Slugs and Snails: Set up beer traps (a shallow dish of beer in the garden) to lure and trap them. You can also use diatomaceous earth around the base of the plant as a natural repellent.
- Earwigs: Make homemade traps using rolled-up newspapers or tinned cans (place them near the plant overnight). You can also use essential oils like peppermint or citrus diluted with water to repel earwigs.
Diseases: Powdery Mildew & Root Rot
Clematis is prone to a few common diseases, but fortunately, they can usually be controlled with proper care.
Powdery Mildew
- What it looks like: A white, powdery substance that appears on the leaves, stems, and flowers.
- Why it happens: Powdery mildew thrives in humid conditions, especially if your clematis is grown in too much shade or poor airflow.
How to Fix It:
- Improve Air Circulation: Prune away any overcrowded stems or leaves to allow better airflow.
- Water at the Base: Avoid wetting the foliage when watering, as moisture on leaves can promote mildew growth.
- Treatment: Spray with fungicide or make a homemade solution using baking soda (1 tablespoon per gallon of water) and a few drops of dish soap to treat the fungus.
Root Rot
- What it looks like: Yellowing leaves, wilting, and a general lack of growth.
- Why it happens: Root rot is caused by overly wet soil or poor drainage, leading to decaying roots.
How to Fix It:
- Ensure Proper Drainage: If your clematis is in soggy soil, consider transplanting it into a better-draining location or improving drainage around the plant.
- Remove Affected Roots: If you notice root rot, carefully dig up the clematis and remove any blackened, mushy roots. Replant it in fresh, well-draining soil.
Yellowing Leaves: What It Means
Yellowing leaves are often a sign that something is amiss with your clematis. Here’s what it could mean:
Overwatering or Poor Drainage
- Symptoms: The leaves turn yellow and may drop off. The soil is consistently soggy.
- Fix: Ensure proper drainage and reduce watering. Only water when the top inch of soil feels dry to the touch.
Nutrient Deficiency (especially Nitrogen)
- Symptoms: Older leaves at the bottom turn yellow, while the newer growth remains green.
- Fix: Apply a balanced fertilizer with micronutrients to support the plant’s nutritional needs.
Pests or Diseases
- Symptoms: Yellowing with visible pests (like aphids) or powdery mildew.
- Fix: Treat for pests or diseases with organic sprays and improve plant care.
With these quick fixes for common clematis problems, you can keep your plant healthy and thriving year after year. Don’t let a little problem stand in your way. Now that you know how to recognize and handle them, you’re one step closer to becoming a clematis care expert.
Clematis Through the Seasons
Clematis is a plant that changes with the seasons, each time bringing something new to enjoy. Knowing how to care for your clematis throughout the year is key to keeping it healthy, happy, and blooming beautifully. Let’s walk through how to look after your clematis during each season.
Spring: Planting and Training
Spring is the season of growth and new beginnings, and it’s the perfect time to plant your clematis or refresh your plant’s structure.
Planting Tips
When to Plant
Early spring is the ideal time to plant clematis, as the soil begins to warm up. If you’re planting a new clematis, make sure to follow the planting steps mentioned earlier: dig a deep hole, bury the crown slightly below the soil surface, and mulch around the base.
Training
Clematis is a climbing plant, so it needs a sturdy structure to grow on. Early spring is the best time to train your clematis onto a trellis, fence, or arbor. Gently tie the stems to the support with soft garden twine, and as the plant grows, continue guiding it in the direction you want.
Summer: Feeding and Blooming
Summer is when clematis reaches its peak, and with the right care, you’ll be rewarded with a stunning display of blooms.
Feeding Tips
Fertilizing
Clematis loves to be fed! In early summer, apply a low-nitrogen fertilizer to encourage blooms. Too much nitrogen can lead to lots of leafy growth but fewer flowers.
Watering
Water your clematis deeply and regularly, especially during hot summer months. Clematis thrives with consistent moisture, but be sure the soil has good drainage to prevent waterlogged roots.
Blooming Tips
As the weather warms, clematis begins to bloom. For Group 1 clematis, enjoy the early flowers that appear in late spring to early summer. Group 2 varieties will give you two rounds of blooms—one in late spring and another in late summer or fall. Group 3 varieties will bloom later in the season, from mid-summer to fall.
Fall: Light Pruning and Cleanup
As the growing season slows down, fall is the time to do some light maintenance to prepare your clematis for the cooler months ahead.
Pruning Tips
For Group 1 clematis, light pruning may be necessary to remove dead or damaged stems after the blooms fade.
Cleanup
Remove any dead leaves or spent blooms from the base of the plant to reduce the risk of disease and pests. You can also trim away any old, damaged wood on Group 2 clematis after they finish blooming.
Preparation for Winter
Consider adding a layer of mulch around the base of the plant to protect the roots during cold weather. For climbers on trellises or walls, you can cut back the growth slightly (without cutting into the old wood) and tie the stems neatly to the support to prevent wind damage.
Winter: Protection and Rest Time
Winter is the season of rest for your clematis. While it takes a break, you’ll need to protect it from harsh conditions.
Protection Tips
Winter Mulching
After the first frost, cover the base of your clematis with a thick layer of mulch or straw to protect the roots from freezing.
Protecting Vines
For clematis planted in containers or in colder climates, you may want to wrap the vines in burlap or protective fleece to prevent frost damage. Make sure there is good airflow to avoid trapping moisture, which could cause rot.
Rest Time
Winter is a time for your clematis to rest, so there’s not much to do in terms of active care. Just keep an eye out for any heavy snow accumulation or ice that could damage the plant.
By adjusting your clematis care to the season, you’ll ensure your plant stays healthy, vibrant, and ready to bloom year after year. From planting and pruning to feeding and protecting, each season offers something special
Clematis Companions
Clematis is stunning on its own, but when paired with the right companions, it becomes even more spectacular. Whether you’re looking to add texture, color, or protection to your clematis, choosing the right plants can make all the difference. Let’s explore some of the best companions for clematis and how they can work together to enhance your garden.
Best Plants to Grow with Clematis
Clematis is a versatile climber that pairs beautifully with a variety of plants. Here are some of the best companions that complement clematis in both appearance and function:
Roses
- Why they work: Clematis and roses are often called the “royal couple” of the garden. Both love the sun, and their blooms complement each other beautifully. Clematis adds vertical interest to rose bushes, while roses provide a stunning backdrop of fragrance and texture.
- Best varieties: Try combining clematis with climbing roses like ‘Zephirine Drouhin’ or David Austin roses for a colorful and fragrant display.
Shrubs
- Why they work: Shrubs provide a solid foundation for clematis to climb, and their dense foliage helps create shade at the base of the plant, keeping the roots cool and protected.
- Best varieties: Opt for medium-sized shrubs like Spirea, Forsythia, or Hydrangea. These offer contrasting foliage, add structure to the garden, and provide support for clematis vines to twirl around.
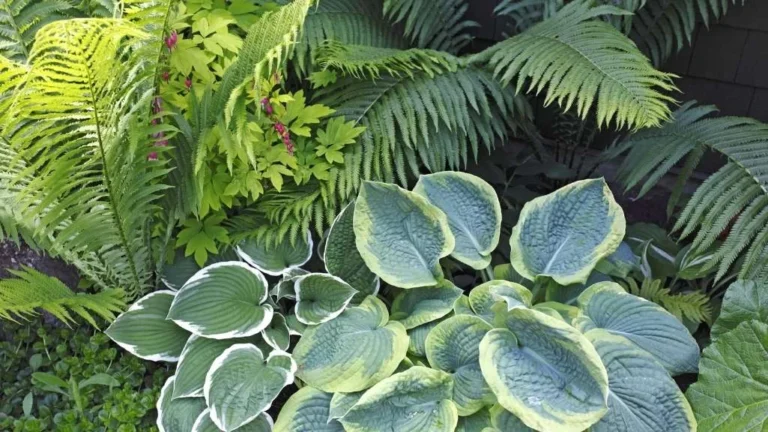
Groundcovers
- Why they work: Groundcovers can act as living mulch, shading the roots of clematis and helping retain moisture in the soil. Plus, they fill in the lower areas of your garden and reduce the need for weeding.
- Best varieties: Consider low-growing plants like hostas, brunnera, or alchemilla mollis (lady’s mantle). Their soft foliage complements the elegance of clematis without overpowering it.
Perennials
- Why they work: Perennials offer year-round beauty and structure, and when planted near clematis, they can create a layered, textural effect. Some perennials also bloom at the same time as your clematis, adding even more color to your garden.
- Best varieties: Echinacea (coneflowers), campanula (bellflowers), and salvia are great choices that pair well with clematis. These plants not only provide visual interest but also attract pollinators like bees and butterflies.
Annuals
- Why they work: Annuals are perfect for adding a splash of color beneath clematis vines. Because they bloom all season long, annuals ensure your garden stays vibrant even when your clematis isn’t in bloom.
- Best varieties: Bright and cheerful annuals like petunias, geraniums, and sweet peas can be placed near the base of clematis to create a lively contrast.
Why Companions Help Clematis
Clematis thrives best when its roots are cool and shaded, and its stems are supported by nearby plants. Companion planting can provide a number of benefits that will help your clematis grow and bloom more vigorously.
Shading the Roots
Clematis has a deep root system that benefits from being shaded during hot weather. Companion plants like groundcovers, low shrubs, or perennials help keep the base of your clematis shaded, preventing the soil from drying out and keeping the roots cool.
Shading the Roots
Clematis has a deep root system that benefits from being shaded during hot weather. Companion plants like groundcovers, low shrubs, or perennials help keep the base of your clematis shaded, preventing the soil from drying out and keeping the roots cool.
Add Visual Interest
Clematis is a dramatic plant, but it can benefit from the soft, complementary textures and colors of its companions. Pairing clematis with roses, shrubs, and perennials can add layers of beauty and interest to your garden, creating a dynamic, visually appealing space.
Creating a Balanced Garden Ecosystem
Companion plants can help attract beneficial insects, like pollinators and ladybugs, which naturally control pests like aphids. This creates a more balanced, sustainable garden environment for your clematis and all its neighboring plants.
Improved Structure and Support
Some plants, like shrubs or small trees, provide sturdy support for climbing clematis. These companions help guide the clematis vines upward, reducing the risk of tangling or falling over. The groundcovers also reduce the need for constant weeding around the clematis’ base.
Pairing clematis with the right companions not only enhances its beauty but also ensures a healthier, more vibrant plant. Whether you’re looking for practical benefits like root shading or simply want to create a more visually interesting garden, these companion plants will complement your clematis beautifully.
Clematis for Small Spaces or Balconies
Even if you don’t have a large garden, clematis can still be a fantastic addition to small spaces or balconies. Here’s how:
Choose compact varieties
Some clematis varieties, like Clematis ‘Little Nell’ or Clematis ‘Arabella’, are perfect for smaller spaces due to their more compact growth.
Use vertical gardening
Clematis thrives on trellises, fences, or balcony railings, making it a great choice for growing vertically rather than taking up ground space.
Containers work well
Plant clematis in large containers with a trellis to provide the right growing conditions without the need for a big garden.
By growing clematis in a container on a balcony or patio, you can enjoy the beauty of its blooms without sacrificing valuable space. Make sure to use well-draining soil and ensure the plant has plenty of sunlight and a sturdy support structure.
By growing clematis in a container on a balcony or patio, you can enjoy the beauty of its blooms without sacrificing valuable space. Make sure to use well-draining soil and ensure the plant has plenty of sunlight and a sturdy support structure.
Pet-Friendly? Toxicity Info for Cats and Dogs
Unfortunately, clematis is toxic to cats and dogs. It contains compounds like saponins and anemonin, which can cause drooling, vomiting, and other digestive issues if ingested. In severe cases, symptoms may be more serious.
To keep your furry friends safe, it’s best to plant clematis in areas they can’t easily reach or consider safer alternatives. For a list of beautiful and safe climbers, check out my guide on Pet-Friendly Outdoor Climbing Plants.
Frequently Asked Questions
Do deer like clematis?
Clematis is generally deer-resistant, meaning deer are less likely to browse on these plants. However, this doesn’t guarantee they won’t nibble on them if food is scarce, so it’s always a good idea to monitor them in areas with high deer traffic.
Can clematis grow in shade?
Yes, clematis can grow in partial shade, but it thrives best with 6 hours of sunlight per day. While it can tolerate some shade, too little light may affect its blooming ability. Keep the roots cool with ground covers while providing sunlight for the stems and flowers.
Do clematis need full sun?
Yes, clematis generally prefers full sun, which encourages better flowering. It requires at least 6 hours of direct sunlight each day for optimal growth and blooms. However, it’s essential to protect the roots from direct sun by shading them with groundcovers or other plants.
How do I grow clematis from seed?
Growing clematis from seed is possible but requires patience. To start, collect seeds after the blooms fade and stratify them by placing them in the refrigerator for a few weeks. Then, plant the seeds in a well-draining, slightly alkaline soil and keep them warm. It may take several months for them to germinate.
Do clematis like coffee grounds?
Clematis may benefit from coffee grounds when used in moderation, as they are slightly acidic and can enrich the soil. However, avoid over-applying, as excessive acidity could harm the plant. Mix coffee grounds with compost for the best results.
Does clematis grow well in Southern California?
Yes, clematis can thrive in Southern California, where the climate is warm and sunny. Choose heat-tolerant varieties, and provide ample water, especially during the hotter months. Ensure the plant has some shade for the roots to keep them cool during the summer.
Can clematis grow in Florida?
Clematis can grow in Florida, particularly in the northern and central regions where temperatures are not as extreme. Select heat-resistant varieties and ensure the plant has enough shade to protect its roots from the intense southern heat.